Your Raspberry Pi’s capabilities extend far beyond what most users typically explore, with dozens of powerful commands hiding just beneath the surface. When you master these terminal instructions, you’ll transform your Pi from a simple single-board computer into a sophisticated system you can monitor, optimize, and troubleshoot with precision. From checking CPU temperatures to configuring network settings and analyzing performance metrics, these 45 essential Raspberry Pi commands will help you access your Pi’s full potential.
Key Takeaways
- Monitor system health with `vcgencmd measure_temp` for temperature and `htop` for process tracking.
- Check available storage with `df -h` and identify space-consuming directories using `du -sh /directory`.
- Configure Wi-Fi via `sudo raspi-config` or by editing `/etc/wpa_supplicant/wpa_supplicant.conf` directly.
- Manage updates with `sudo apt update` and `sudo apt full-upgrade` for security and performance.
- Find network information using `hostname -I` for local IP and `ip a` for detailed interface data.
Checking Your Pi’s CPU Temperature
Two primary methods exist for checking your Raspberry Pi’s CPU temperature through the command line. The most direct approach is using `vcgencmd measure_temp`, which displays the SoC temperature in Celsius. Additionally, monitoring your Pi’s performance is critical, especially with the Raspberry Pi 5, which offers significant improvements in processing capabilities.
Alternatively, read from `/sys/class/thermal/thermal_zone0/temp` and divide by 1000 for °C values. For real-time tracking, combine with the `watch` command: `watch -n 2 vcgencmd measure_temp` updates readings every two seconds. Custom scripts can enhance functionality by displaying both CPU and GPU temperatures simultaneously. Monitoring is especially crucial when overclocking your Raspberry Pi due to the lack of built-in cooling systems.
Create valuable aliases in your `~/.bashrc` file to simplify temperature monitoring. For example, define `temp` to execute the full command path. You can create a simple bash script with proper permissions using chmod +x to make monitoring more convenient.
This proves especially useful when tracking temperature thresholds during overclocking or in hot environments, preventing system throttling and potential hardware damage.
Monitoring System Uptime
You can monitor your Raspberry Pi’s system uptime with the simple `uptime` command, which displays runtime duration, logged-in users, and CPU load averages for the last 1, 5, and 15 minutes. The command accepts various options like –pretty to display the uptime in a more human-readable format.
For continuous monitoring, implement `watch -n 60 uptime` to refresh statistics every minute, or redirect output to a log file using `uptime -p >> uptime.log` for long-term performance analysis.
Advanced users might consider deploying Uptime Kuma via Docker for thorough service monitoring with notification capabilities through Discord, Telegram, or email when your Pi experiences downtime. After installation, you’ll need to create an account to access the web interface where you can configure your monitors.
Check Uptime Statistics
Monitoring your Raspberry Pi’s uptime is a fundamental aspect of system administration that provides critical insight into the device’s reliability and operational status. The `uptime` command delivers thorough system resource monitoring with minimal overhead.
- Execute `uptime` without arguments to view current time, system uptime, logged-in users, and load averages (1, 5, and 15 minutes).
- Use `uptime -p` for human-readable format: “up 3 days, 2 hours, 15 minutes”.
- Display exact boot time with `uptime -s`, returning a timestamp like “2023-04-12 09:35:22”.
- Implement uptime command optimization in scripts to log performance data and schedule maintenance based on continuous operation duration.
Load averages help identify potential resource bottlenecks, making it essential for preventative maintenance and performance tuning on your Pi device. For more comprehensive monitoring of both local and external services, consider implementing Uptime Kuma as a lightweight solution for tracking availability. The command comes pre-installed on Raspberry Pi OS, so you can immediately start tracking your system’s operational status.
Memory Load Tracking
Beyond tracking uptime, effective Raspberry Pi management requires close attention to memory usage patterns. The `free -m` command provides a snapshot of RAM and swap memory in megabytes, helping you quickly assess available resources. Additionally, understanding the essential hardware requirements can help optimize performance by ensuring adequate resources are available for your projects.
For continuous monitoring, employ `htop`, which offers a colorized, interactive view of memory consumption by process—essential for memory leak detection.
When your Pi’s performance degrades, check swap memory management with `vmstat 1`, which updates memory statistics every second. This tool reveals paging activity and can identify when your system relies too heavily on swap space. The command `iostat 1` delivers disk activity data that shows read/write operations with their latency information. Remember that some RAM is reserved for the GPU, reducing available memory. You can use `top` and press `Shift + m` to sort by memory usage for a quick overview of resource-intensive processes.
For exhaustive system health monitoring, combine memory tracking with temperature and CPU load metrics using customized `htop` configurations, enabling proactive resource management before issues arise.
Viewing Available Storage Space
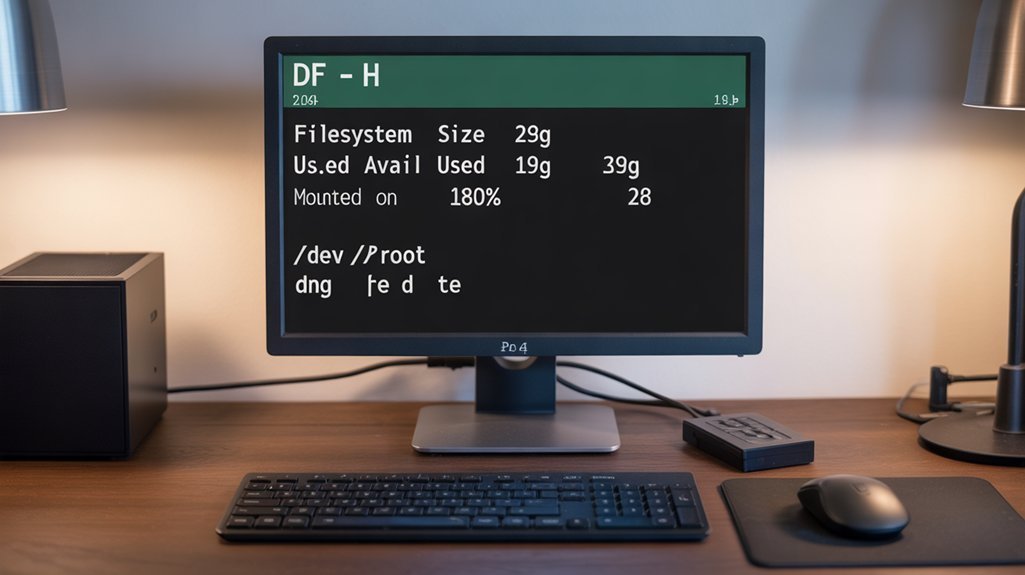
Viewing available storage space on your Raspberry Pi is critical for maintaining system performance and preventing SD card failures. Effective space monitoring helps you implement timely disk cleanup strategies before storage issues impact your projects.
- Use `df -h` for a human-readable overview of all filesystems, showing total, used, and available space percentages.
- Run `du -sh /directory` to identify storage-hungry folders requiring filesystem management attention.
- Implement `df -i` to check inode usage, which can limit operations even when physical space remains.
- Execute periodic storage optimization by combining `df` for system-wide analysis with `du` for targeted directory assessment. Additionally, understanding SD card write cycles is crucial for preserving data integrity and longevity.
Remember that SD cards have limited write cycles, making proactive storage monitoring particularly important for extending your Pi’s operational lifespan and reliability.
The command displays important partitions like dev/mmcblk0p2 where most of your Raspberry Pi’s operating system and files are stored.
For a more visual approach to disk analysis, try using Disk Usage Analyzer which provides graphical representations of your storage consumption.
Displaying Memory Usage
Memory usage on a Raspberry Pi requires close monitoring since these single-board computers operate with limited RAM resources, typically ranging from 512MB to 8GB depending on the model. For efficient memory management, you’ll need to utilize specific commands that provide insights into your system’s resource allocation. Understanding that RAM is fixed on Raspberry Pi boards and cannot be upgraded makes choosing the right model crucial for your projects. When checking your device’s memory, be aware that a 32-bit OS will only address up to 4GB of RAM even if your Pi has 8GB installed.
| Command | Function |
|---|---|
| `free -h` | Human-readable memory overview with units |
| `htop` | Interactive process viewer with color-coded memory bars |
| `vmstat 1` | Real-time virtual memory statistics updated every second |
The `top` command displays real-time memory usage, and pressing `Shift+m` sorts processes by memory consumption. For thorough memory command overview, examining `/proc/meminfo` provides detailed statistics for advanced troubleshooting when your Pi experiences performance issues.
Discovering Your Raspberry Pi’s IP Address
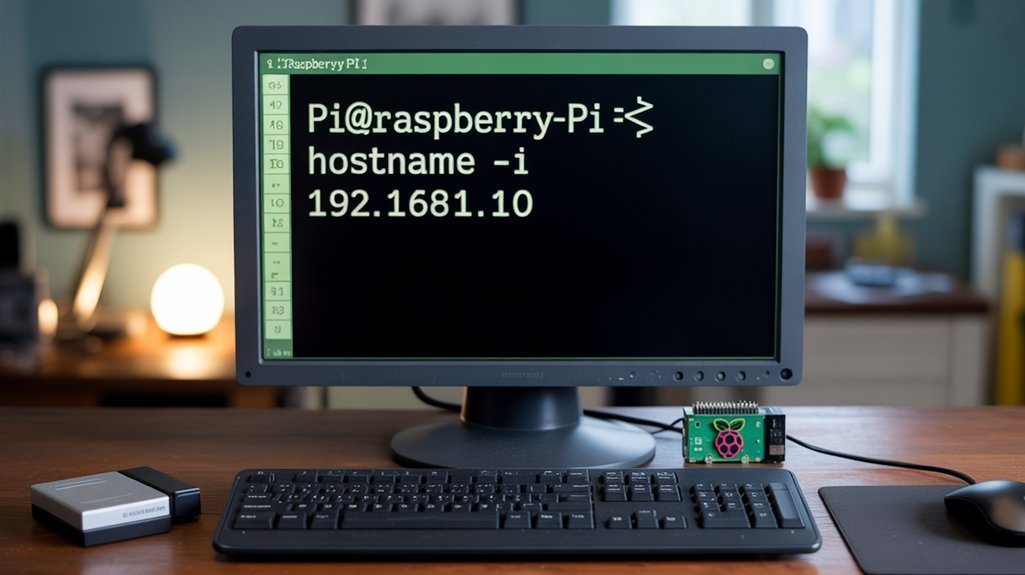
Finding your Raspberry Pi’s IP address represents a fundamental networking skill for any Pi user, especially when setting up remote connections or troubleshooting network issues.
Locating your Pi’s IP address is essential for remote access and effective network management.
Mastering IP Addressing Techniques enables efficient management of your Pi across networks.
- Use `hostname -I` for a quick, concise view of your local IP addresses without excess information
- Run `ip a` to display thorough network interface details including both IPv4 and IPv6 addresses
- Check your router’s admin interface to view all connected devices for Local Network Discovery
- Execute `curl http://ifconfig.me` to determine your Pi’s public IP when accessing from outside networks
The `ip r` command allows you to easily identify your default gateway IP, which is crucial for proper network configuration.
For desktop environments, simply hover over the network icon in the taskbar to quickly view your current IP—considerably faster than command line methods when working directly on the Pi.
You can also use the `ping raspberrypi` command from another device on your network to discover your Pi without needing physical access to the device itself.
Setting Up Wi-Fi From The Command Line
You’ll need to configure your Raspberry Pi’s Wi-Fi connection either through raspi-config‘s Network Options menu or by directly editing the wpa_supplicant.conf file.
For the raspi-config method, run `sudo raspi-config`, navigate to Network Options > Wi-Fi, then enter your network SSID and password before rebooting to apply settings. Additionally, ensure you have a stable 5V/3A USB-C power supply to avoid connectivity issues.
Alternatively, manually edit `/etc/wpa_supplicant/wpa_supplicant.conf` with your network details using the correct format that includes ssid, psk, and key_mgmt parameters before restarting networking services. You can verify your Wi-Fi interface status with SSH commands by checking the network interfaces file. When configuring WiFi for a headless setup, you’ll also need to create an ‘ssh’ file on the SD card boot partition to enable remote access.
Configure Network Preferences
Setting up Wi-Fi on your Raspberry Pi through the command line provides flexibility when working with headless setups or when the graphical interface isn’t available.
You’ll need to manage network interfaces for proper Wi-Fi configuration and troubleshooting.
- Verify available networks with `sudo iwlist wlan0 scan`, which displays nearby SSIDs and signal strength analysis.
- Configure IP address settings in `/etc/dhcpcd.conf`, choosing between static vs dynamic DHCP configuration. You can also enhance security by using SSH key authentication to prevent unauthorized access to your device.
- Connect to secured networks using `wpa_cli` commands—add networks, set SSIDs, and manage wireless security parameters.
- Diagnose connection issues with `ping`, `ifconfig`, and `iwconfig` for thorough network troubleshooting and performance monitoring.
For a more streamlined approach, use the `raspi-config utility` which provides a text-based interface to set up wireless connections without complex commands.
After making changes, restart networking services with `sudo systemctl restart networking` to apply your new configuration without rebooting.
Alternatively, you can manually edit the `/etc/wpa_supplicant/wpa_supplicant.conf` file to directly specify your Wi-Fi credentials in older Raspberry Pi OS versions.
Edit Wpa_Supplicant File
The wpa_supplicant.conf file serves as the central configuration repository for your Raspberry Pi’s wireless connections, storing critical network credentials and settings.
To edit it via command line, use:
“`
sudo nano /etc/wpa_supplicant/wpa_supplicant.conf
“`
Proper file syntax requires maintaining specific formatting for network blocks containing your SSID details and passwords. Raspberry Pi OS is designed to optimize performance specifically for the hardware, ensuring efficient management of system resources.
Always create configuration backups before modifications:
“`
sudo cp /etc/wpa_supplicant/wpa_supplicant.conf /etc/wpa_supplicant/wpa_supplicant.conf.bak
“`
When troubleshooting connectivity issues, verify your country code configuration is correct.
For automation scripting, you can programmatically modify the file or use wpa_cli for dynamic updates.
Remember that permissions management is critical—all edits require root access via sudo to prevent access failures.
To avoid duplicate entries when adding networks multiple times, implement a duplicate check in your automation scripts.
You can place a wpa_supplicant.conf file in the boot partition for automatic configuration during startup if you’re setting up wireless before first boot.
Managing System Updates
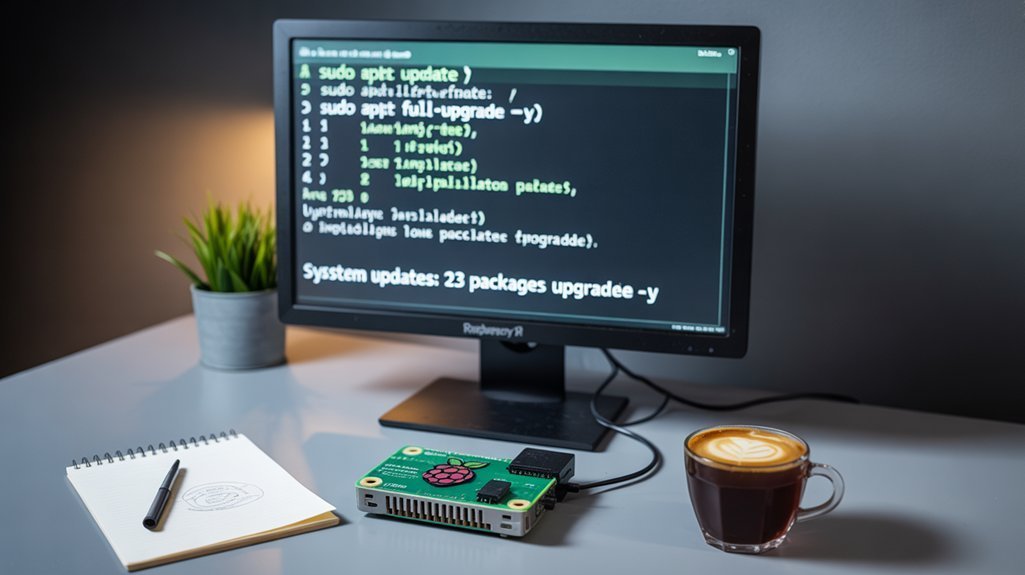
Maintaining a Raspberry Pi system requires regular updates to affirm security, stability, and access to the latest features. Proper update frequency and upgrade strategies maintain ideal system stability while preventing potential package management issues.
- Run `sudo apt update` to refresh your package repository information without installing anything.
- Execute `sudo apt full-upgrade` to install all available updates, including those requiring dependency changes.
- Check available disk space using `df -h` before upgrading to prevent interrupted installations.
- Create automated update scripts with `sudo apt update && sudo apt full-upgrade -y` for hands-off maintenance.
Remember that kernel updates and firmware maintenance arrive through the standard apt system. After significant updates, a system reboot (`sudo reboot`) affirms all changes take effect properly.
Regular Raspberry Pi updates ensure optimal security and stability while avoiding package management complications.
For systems with limited storage, `sudo apt clean` removes cached package files to free up valuable disk space.
Installing Software Packages
To install software packages on your Raspberry Pi, you’ll need to maintain current package sources by running `sudo apt update` before installing applications with `apt install`.
You can expand available software options by adding custom repositories to `/etc/apt/sources.list`, though you should verify ARM compatibility for all packages.
When standard repositories don’t offer what you need, consider third-party sources or manual installations using `dpkg` for Debian packages or compiling from source code. Additionally, familiarity with package management fundamentals can greatly enhance your efficiency in managing software on your Raspberry Pi.
Updating Package Sources
When managing your Raspberry Pi system, regularly updating package sources forms the foundation of proper software maintenance. The system’s package cache must be synchronized with the remote repositories to enable accurate version tracking of available software.
The configuration for Raspberry Pi OS package sources resides in `/etc/apt/sources.list`. To refresh your local database:
- Run `sudo apt update` to synchronize available package information.
- Check available disk space with `df -h` before proceeding with upgrades.
- Execute `sudo apt full-upgrade` to install new versions with proper dependency handling.
- Reboot with `sudo reboot` after significant updates to activate kernel changes.
This update process doesn’t install new software but prepares your system for future installations and security patches, ensuring your Pi remains current and secure.
Essential Installation Syntax
The Raspberry Pi’s software ecosystem relies on several package management tools that provide different installation methods to suit your needs. For standard command line installation, use `sudo apt install
The legacy `apt-get` alternative offers similar functionality with thorough dependency resolution.
For offline installations, `sudo dpkg -i
When encountering installation errors, verify your software repositories in `/etc/apt/sources.list` and run `sudo apt update` to refresh package indices.
Advanced apt usage includes cleaning package caching with `sudo apt clean` and checking configuration verification with `dpkg -l`.
When troubleshooting, examine repository branches to confirm they match your OS version for ideal compatibility.
Managing Package Repositories
Managing your Raspberry Pi’s package repositories effectively provides the foundation for all software installation and maintenance tasks. Through repository management, you’ll gain access to thousands of vetted packages while ensuring package authentication for system security.
Your primary sources are configured in `/etc/apt/sources.list` and `/etc/apt/sources.list.d/` directories.
- Use `apt-cache show
` to verify version, maintainer, and dependencies before installation. - Search available packages with `apt-cache search
` to discover relevant software. - Optimize download speeds by selecting geographic mirrors closer to your location.
- Maintain system health with `sudo apt clean` to remove cached packages and `sudo apt autoremove` for orphaned dependencies.
For enhanced functionality, consider adding specialized repositories that align with your project requirements while maintaining system stability.
Removing Unwanted Software
Removing unnecessary software from your Raspberry Pi not only frees up valuable disk space but also improves system performance by reducing background processes and memory usage. The most efficient package management strategy is using `sudo apt remove
The GUI “Add/Remove Software” tool offers a visual alternative for those who prefer graphical interfaces. When working with headless setups, consider using specialized scripts like `unused_rpi.sh` to systematically strip pre-installed packages. To identify candidates for removal, use `apt list –installed | grep
Rebooting Your Pi Safely
Your Raspberry Pi requires proper shutdown procedures to prevent corruption of the SD card and system files.
You’ll find several methods to safely reboot your system, including the standard `sudo reboot` command, the more flexible `sudo shutdown -r now` option, or scheduling reboots with timing parameters like `sudo shutdown -r +10` for a 10-minute delay.
When managing your Pi remotely via SSH, you can initiate reboots from anywhere on your network, but should allow sufficient time for processes to terminate gracefully before the system restarts.
Proper Shutdown Commands
Although powering off your Raspberry Pi might seem as simple as unplugging it, proper shutdown procedures are essential to prevent filesystem corruption and extend SD card lifespan. Implementing graceful halts guarantees power cleanliness and data integrity across your projects.
- Execute `sudo shutdown -h now` or `sudo poweroff` in terminal for immediate, safe shutdown
- Monitor the green ACT LED—wait until it stops blinking before disconnecting power
- Add `dtoverlay=gpio-shutdown` to `/boot/config.txt` to enable hardware button functionality
- Create custom Python scripts running as systemd services for sophisticated shutdown automation
For headless setups, GPIO-based safety mechanisms provide convenient shutdown options without requiring terminal access.
Always verify complete shutdown by checking LED status before power disconnection—this simple habit greatly reduces the risk of filesystem damage.
Scheduled Reboot Options
Raspberry Pi systems, much like any computer, benefit from periodic reboots to maintain peak performance. To address potential performance degradation, setting up scheduled maintenance through cron jobs provides an elegant solution. Additionally, ensuring your Raspberry Pi has sufficient power requirements is crucial to prevent issues during reboots.
| Command | Purpose | Cron Syntax | Reboot Frequency | Best For |
|---|---|---|---|---|
| `sudo crontab -e` | Edit root scheduler | N/A | N/A | Initial setup |
| `/sbin/shutdown -r now` | Safe reboot with unmounting | `0 3 * * *` | Daily (3am) | Regular use |
| `/usr/sbin/reboot` | Alternative reboot command | `0 0 * * 0` | Weekly (Sunday) | Low-use systems |
| `>/root/boot.log 2>&1` | Log output redirect | Append to command | Any | Troubleshooting |
| `/etc/crontab` edit | System-wide scheduling | Standard syntax | Custom | Multiple users |
Choose appropriate reboot commands and frequencies based on your Pi’s workload—daily for servers, weekly for occasional-use projects.
Remote Restart Methods
Remote administration of a Raspberry Pi often necessitates performing system restarts without physical access to the device.
SSH command execution provides the most secure and reliable approach, allowing you to run `sudo reboot` after establishing a connection to your Pi’s IP address.
For more advanced remote restart methods, consider:
- Implementing service management scripts using `systemctl restart
` when full reboots aren’t required - Creating hardware reset techniques by configuring GPIO pins with executable scripts like `reset.sh`
- Setting up automated desktop files that trigger reboot commands through custom events
- Establishing SSH shortcuts on your client machine to streamline the connection and reboot process
When your Pi becomes unresponsive, pin-controlled hardware reset techniques offer a fallback solution that bypasses the need for SSH connectivity.
Shutting Down Your Pi Properly
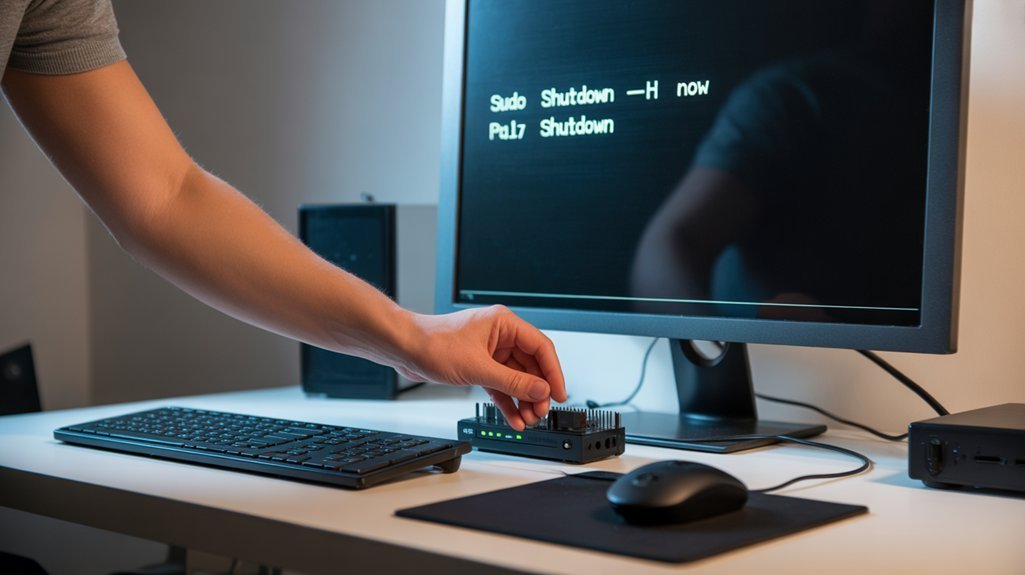
Properly shutting down your Raspberry Pi is essential to maintain system integrity and prevent potential SD card corruption. Never simply unplug your Pi while it’s running, as this can damage your file system and shorten your SD card’s lifespan.
| Shutdown Method | Command/Action |
|---|---|
| GUI Interface | Click Raspberry Pi icon → Shutdown |
| Command Line | `sudo shutdown -h now` |
| Hardware Option | Connect button between GPIO pins 5-6 |
Always wait until the green activity LED stops flashing completely before disconnecting power. For headless setups, use SSH to execute `sudo shutdown now` or implement a hardware shutdown button with a simple Python script. These safe powering procedures guarantee all processes terminate cleanly and all data writes complete, protecting your system from corruption during shutdown procedures.
Checking For Undervoltage Issues
When your Raspberry Pi shows performance issues or unexpected reboots, undervoltage problems are likely culprits that need immediate investigation. You can perform thorough undervoltage diagnosis through several command-line approaches.
- Run `vcgencmd get_throttled` to check current and historical voltage status—a result like `0x50005` indicates active undervoltage conditions.
- Examine kernel logs with `dmesg | grep -iC 3 “under-voltage detected”` to reveal past power supply instabilities.
- Deploy real-time scripts that continuously monitor throttling status bits to catch intermittent power fluctuations.
- Complement software detection with physical measurement when troubleshooting persistent issues, as command-based methods have inherent limitations.
The Pi automatically throttles performance when voltage drops below 4.65V, protecting your system but degrading performance. Regular monitoring helps identify power supply issues before they cause data corruption. Additionally, understanding HSM architecture can help ensure a secure environment for your Raspberry Pi applications.
Viewing Running Processes
Viewing your Pi’s running processes lets you track system performance and identify resource-intensive applications through commands like `top` and `ps`.
You’ll need to monitor memory usage with `free` to guarantee your applications have sufficient resources, particularly when running intensive workloads or multiple concurrent services.
Background services can be managed through `systemctl` commands that allow you to start, stop, or check the status of critical system components.
Process Management Basics
Managing processes efficiently on your Raspberry Pi requires understanding how to view and monitor the running programs that consume system resources. Effective process control begins with identifying what’s running on your system using these fundamental commands:
- Use `ps axg` to obtain a snapshot of all system processes, including those without terminals
- Run `top` for real-time monitoring, pressing `M` to sort by memory usage or `P` for CPU usage
- Combine `ps` with `grep` (e.g., `ps axg | grep python`) to quickly locate specific processes
- Terminate unwanted processes with `kill [PID]` or `killall [process_name]` when necessary
Process prioritization becomes essential when maximizing performance on the Pi’s limited resources, particularly when handling CPU-intensive applications or multitasking environments.
Memory Usage Monitoring
Memory usage monitoring complements process management by providing deeper insights into your Raspberry Pi’s resource allocation. For quick assessments, run `free -h` to view RAM usage in human-readable format.
When implementing memory enhancement techniques, use `top` and press `Shift+m` to identify memory-intensive processes.
For enhanced visualization, install `htop` which offers colorful, interactive monitoring with clear RAM and swap usage metrics. Advanced users should leverage `vmstat 1` to track memory swap management and paging activities in real-time, revealing potential performance bottlenecks from excessive swapping.
Monitor related storage constraints with `df -h` and `du -sh /*`, as limited disk space can force aggressive swapping. These commands provide the diagnostic foundation necessary for maintaining excellent performance on resource-constrained Raspberry Pi systems.
Background Service Commands
To effectively maintain control of your Raspberry Pi system, you’ll need to master several essential commands for viewing and managing running processes. Understanding these tools helps when troubleshooting performance issues or managing dependencies between system components.
- top – Displays real-time process information with dynamic sorting options; press ‘M’ for memory usage and ‘P’ to sort by CPU utilization
- ps axg | grep [program-name] – Quickly filters the complete process list to locate specific services
- kill [PID] – Terminates processes by their ID; useful for adjusting process priority or stopping unresponsive applications
- killall [name] – Terminates all instances of a specified program, particularly helpful when multiple instances are running simultaneously
For extensive system monitoring, combine these commands with resource utilities like iostat to gain thorough insights into your Pi’s performance.
Creating New Directories

Creating directories on your Raspberry Pi requires mastery of the `mkdir` command, which serves as the foundational tool for organizing your filesystem structure.
The basic syntax is straightforward—type `mkdir` followed by your desired directory name. For multiple directories, separate names with spaces: `mkdir work college games` or use brace expansion: `mkdir {pimy,lifeup,exampledir}` for efficient directory management.
When building nested structures, utilize the `-p` option (`mkdir -p parent/child/grandchild`) to create all necessary parent directories simultaneously.
For added control, combine with `-v` for verbose feedback on each directory created. Set permissions during creation with the `-m` option—for example, `mkdir -m 755 projectdir` establishes rwxr-xr-x permissions immediately.
These mkdir examples simplify directory management tasks across your Raspberry Pi projects.
Copying Files And Directories
The `cp` command serves as the essential tool for duplicating files and directories across your Raspberry Pi‘s filesystem, offering both basic and advanced functionality through numerous options.
When transferring directories, you’ll need specific flags to guarantee proper duplication of your data.
- Use `cp file.txt /destination/` for copying files to a specific location
- Add the `-r` flag (`cp -r sourceDir/ destDir/`) when transferring directories recursively
- Preserve file attributes with `-p` to maintain timestamps, permissions, and ownership
- Implement `scp` for secure copying between your Pi and remote machines: `scp file.txt user@remote:/path/`
For situations where you need constant synchronization rather than duplication, consider symbolic links with `ln -s` instead of copying files, creating references that automatically update when originals change.
Moving Files Around Your System
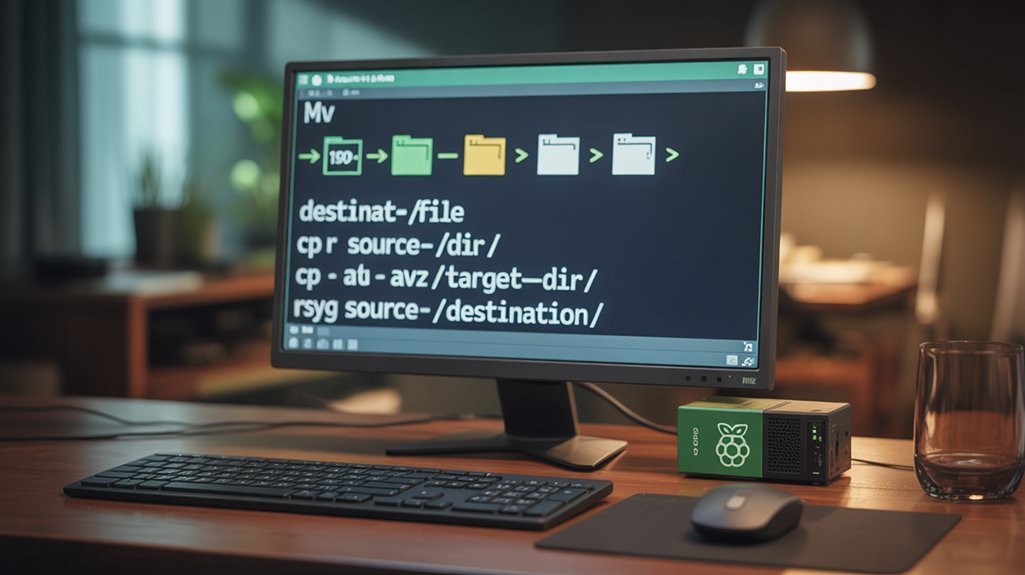
Moving files throughout your Raspberry Pi system requires understanding both the fundamental commands and proper navigation techniques to guarantee efficient file management.
Effective file management on Raspberry Pi demands mastery of basic commands and navigation skills for seamless system operation.
The `mv` command is your primary tool, using the syntax `mv [source] [destination]` with either relative or absolute paths. Before moving files, use `cd` to navigate directory structures and `pwd` to confirm your location.
When working with external storage, proper mount point management is essential. Create mount points under `/mnt`, then use `mount` to attach external devices.
Remember that filesystem navigation between different storage types may require additional drivers like `exfat-fuse`. Always verify file permissions before moves to avoid errors, and monitor system activity with `lsof` to identify locked files.
Use `ls` after operations to confirm successful transfers.
Changing File Permissions
When managing files on your Raspberry Pi, understanding how to modify file permissions becomes essential for maintaining system security and controlling access to sensitive data. The `chmod` command provides granular file access control using either symbolic notation (u+x) or numeric representation (755).
- Use `chmod 644 filename` for standard files (owner read/write, others read)
- Apply `chmod 755 filename` for scripts (owner full access, others read/execute)
- Execute `sudo chmod -R 750 directory/` for recursive permission management
- Change ownership with `sudo chown pi:pi filename` to adjust access rights
Always apply the principle of least privilege with your permission management strategy. Avoid setting permissions to 777, which exposes your system to security vulnerabilities.
Instead, grant only the minimum access required for files to function properly.
Finding Files On Your Pi
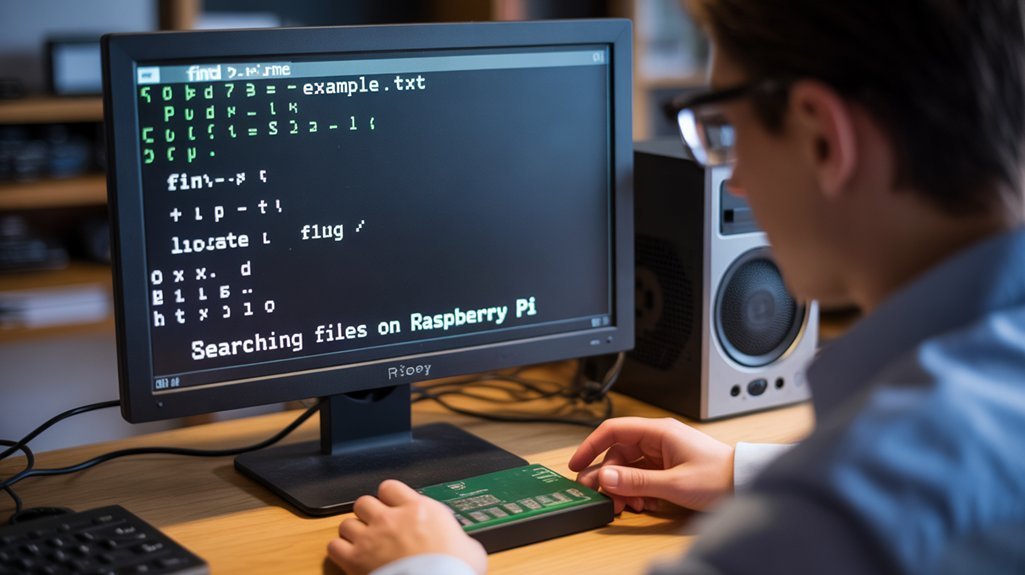
Files on your Raspberry Pi can quickly accumulate across the system, making effective search techniques a valuable part of your Linux toolkit. For maximum command efficiency, leverage these specialized tools:
Use `find /home -name “*.py”` to search recursively for Python files, or add `-mtime -7` to locate files modified in the last week.
For lightning-fast searches, `locate filename` queries a pre-built database; just run `sudo updatedb` first to guarantee recency.
When managing file organization, identify executable locations with `which python3` or use `whereis` to find binaries and documentation.
For content-based searches, combine commands like `grep -r “import tensorflow” /home/pi/projects` to find specific code patterns across multiple files.
Editing Text Files With Nano
Mastering text editing on the Raspberry Pi begins with nano, a lightweight, user-friendly editor that comes pre-installed on Raspberry Pi OS.
This versatile tool enables basic text manipulation directly from your terminal—simply type `nano filename` to begin editing.
Navigate and edit efficiently with these essential commands:
- CTRL+O saves your work while CTRL+X exits (prompting for unsaved changes)
- CTRL+W initiates search functionality; combine with CTRL+R for text replacement
- ALT+A activates text selection; use ALT+6 to copy or CTRL+K to cut selections
Advanced options like nano syntax highlighting can be configured through the nanorc file.
For greater precision, use command-line options like `-T
These features transform nano into a powerful development tool for your Pi projects.
Viewing Large Text Files With Less

You’ll find the less command essential for efficiently viewing large text files on your Raspberry Pi without loading the entire file into memory.
Less offers powerful navigation shortcuts including line-by-line scrolling with arrow keys, page-by-page movement with Space and PgDn, and instant jumps to file beginning or end with Home and End keys respectively.
When searching through voluminous logs or configuration files, you can quickly filter content by pressing ‘/’ followed by your search term, then use ‘n’ and ‘N’ to move between highlighted matches forward or backward.
Less Command Basics
The humble `less` command stands as one of the most essential utilities for efficiently viewing text files on your Raspberry Pi.
Unlike `cat` which dumps entire contents to your terminal, `less` lets you navigate through files one screen at a time, preserving system resources.
- Use `less filename` to view logs or configuration files without loading them completely into memory
- Press `/pattern` to search within files, then navigate matches with `n` and `N` keys
- Monitor real-time updates with `less +F logfile` – perfect for watching system logs as they change
- Enter `v` while viewing to quickly edit the current file in your default text editor
To exit `less`, simply press `q` to return to your command prompt.
Navigation Shortcuts
Five essential navigation shortcuts transform how you’ll work with large text files in the `less` command.
Move line-by-line using `j` (down) and `k` (up), or navigate entire screens with `f` (forward) and `b` (backward).
Jump instantly to file extremities with `g` (beginning) and `G` (end).
For precise file navigation, type a line number followed by `g` or use `:` with a number.
When monitoring changing files, `F` enables continuous viewing like `tail -f`, while `R` refreshes to show recent changes.
The `v` shortcut seamlessly opens your current file in your default editor.
For horizontally extensive content, use arrow keys for side-scrolling or launch `less` with `-S` to disable wrapping, making wide data files and code markedly more readable.
Search And Filtering
Search patterns using `/keyword` (forward) or `?keyword` (backward), then press `n` or `N` to navigate between matches
Combine with command pipelines like `dmesg | less` to review system logs efficiently
Use options like `-N` for line numbers and `-I` for case-insensitive searching when filtering results
Monitor logs in real-time with `+F` option, similar to `tail -f` but with full navigation capabilities
When working with kernel logs or configuration files, these techniques markedly accelerate troubleshooting by helping you locate critical information instantly.
Checking Internet Connectivity

Why spend hours debugging software issues when your Raspberry Pi might simply lack internet connectivity? Start with basic ping commands and network diagnostics to identify where problems occur. DNS troubleshooting often reveals issues that aren’t apparent from simple connectivity checks.
| Command | Purpose | Output Indicates |
| `ping -c 4 google.com` | Test connectivity with DNS | Network + DNS functioning |
| `ping 8.8.8.8` | Test raw connectivity | Network functioning without DNS |
| `ifconfig wlan0` | Check WiFi interface | IP assignment success |
| `dig google.com` | Detailed DNS resolution | DNS server response quality |
For deeper analysis, use `traceroute` to pinpoint connection failures along the route. Verify your `wpa_supplicant.conf` settings when WiFi connections fail, and consider testing throughput with `iperf` when connections are slow but functional.
Scanning Available Wi-Fi Networks
After confirming your Raspberry Pi has internet connectivity, you’ll often need to inspect the available Wi-Fi networks before troubleshooting connection issues. Effective Wi-Fi scanning not only reveals nearby networks but also provides critical details about signal strength and security protocols.
For deeper analysis, utilize monitoring tools that capture packet-level data, enabling robust evaluation of Raspberry Pi connectivity options in complex environments.
Managing Services With Systemctl
You’ll manage Raspberry Pi services with systemctl’s fundamental commands, which provide extensive control over system processes.
To manipulate services directly, use `systemctl start
For monitoring service health, `systemctl status
Starting and Stopping Services
Managing services on your Raspberry Pi is essential for controlling background processes and system functionality. The `systemctl` command provides extensive service management capabilities, allowing you to control when services run and troubleshoot service dependencies.
For advanced troubleshooting, examine service configurations with `systemctl cat
Remember that killing essential services may render your system inaccessible.
Viewing Service Status
Monitoring the health and operational state of services running on your Raspberry Pi is critical for effective system management. Use `systemctl status service.service` to obtain detailed information about a service’s current state, including whether it’s running, failed, or stopped.
For scripted service automation strategies, implement `systemctl is-active –quiet service.service`, which returns silently with exit code 0 when active. Filter running services with `systemctl list-units –type=service –state=running` for a thorough overview.
When implementing service troubleshooting techniques, identify failed units with `systemctl –failed`, then examine the specific service logs using `journalctl -u service.service`.
For boot-time configuration, verify enabled services with `systemctl is-enabled service.service`. This approach guarantees you can quickly identify and resolve service issues while maintaining peak system performance.
Viewing System Logs
View current system logs with `sudo cat /var/log/syslog` or navigate more effectively using `sudo less /var/log/syslog`
Monitor application log insights by accessing specific app logs at `/var/log/app.log`
Enable real-time logging with `tail -f /var/log/syslog` to track system events as they occur
Enhance security log monitoring by checking `/var/log/auth.log` for authorization attempts and potential breaches
Remember that older logs undergo rotation to preserve disk space, with compressed archives named sequentially (syslog.1.gz, syslog.2.gz).
Taking Screenshots From The Terminal
You’ll find Scrot particularly useful for capturing screenshots directly from the Raspberry Pi terminal with commands like `scrot` for full-screen captures or `scrot -s` for interactive region selection.
For timed screenshots, you can specify a delay using the `-d` parameter (e.g., `scrot -d 5` for a 5-second delay) which proves helpful when you need to prepare your screen before capture.
Custom naming conventions can be implemented with format strings such as `scrot ‘%Y-%m-%d_$wx$h.png’` to automatically include date and resolution information in your screenshot filenames.
Screenshot Basics
Taking screenshots from the Raspberry Pi terminal provides a versatile way to capture your screen’s contents without relying on GUI applications. The command-line tool `scrot` offers powerful screenshot automation capabilities with various command line options.
For keyboard shortcuts, edit the `lxde-pi-rc.xml` file to bind the PrintScreen key to scrot.
After making changes, restart Openbox with `openbox –restart` to apply them immediately.
Advanced Capture Options
Beyond basic screenshot functionality, Raspberry Pi offers several powerful terminal-based tools for capturing your screen with precision. For remote capturing sessions, you’ll need to set `export DISPLAY=:0` first to access the graphical environment.
| Tool | Advanced Capability |
| Grim | Precise area selection with coordinates |
| Scrot | Mouse-driven region selection with `-s` |
| Import | Window-specific captures with single click |
| Timed | Delayed captures for capturing popups |
| Scripted | Cron-scheduled monitoring screenshots |
Elevate your screenshot scripting by incorporating delay parameters (`scrot -d 5`) for timed captures or area selection (`scrot -s`) to document specific interface elements. When working headless, combine these commands with automation scripts to create powerful monitoring solutions or documentation tools without requiring direct access to the desktop environment.
Recording Video Of Your Desktop
Recording video of your desktop on Raspberry Pi can be accomplished through several dedicated screen capture applications that offer both GUI and command-line interfaces.
These tools provide flexible options for desktop recording with customizable settings to match your specific requirements.
Flexible desktop recording options with adjustable settings ensure your Pi captures exactly what you need, how you need it.
Install Vokoscreen with `sudo apt install vokoscreen` for extensive screen capture with adjustable recording area, frame rate, and audio source options
Set up SimpleScreenRecorder using `sudo apt install simplescreenrecorder` as an alternative GUI-based recording solution
Access both applications through the Raspberry Pi menu under Sound & Video after installation
Automate screen recording sessions with custom scripts that control start/stop functions and automatically timestamp filenames
For innovation projects requiring screen demonstrations or tutorials, these recording tools transform your Pi into a powerful content creation platform.
Checking CPU Information
You’ll gain essential system insights by monitoring your Raspberry Pi’s CPU temperature using the `vcgencmd measure_temp` command, which displays the current processor heat level in Celsius.
To analyze processor load in real-time, run the `top` command and press “1” to view per-core usage statistics, or install the more advanced `htop` utility for enhanced visualization of CPU metrics.
Regular temperature and load monitoring helps you identify potential performance bottlenecks, prevent thermal throttling, and guarantee your Pi operates efficiently even during resource-intensive tasks.
CPU Temperature Monitoring
Monitoring your Raspberry Pi’s CPU temperature is essential for ensuring peak performance and preventing hardware damage from overheating. The most direct CPU temp monitoring technique is using `vcgencmd measure_temp`, which displays readings in Celsius. For continuous observation, implement `watch -n 2 vcgencmd measure_temp` to refresh every two seconds.
For permanent convenience, create bash aliases in your `.bashrc` file to quickly check temperatures with simple commands.
Processor Load Analysis
Alongside temperature monitoring, understanding your Raspberry Pi’s processor load is essential for optimizing performance and resource allocation. Several commands give you insights into CPU metrics analysis and performance bottleneck prediction:
| Command` | Function | Usage Example |
| ‘top’ | Real-time process monitor | ‘top’ |
| ‘htop’ | Enhanced interactive viewer | ‘htop’ |
| mpstat | Per-processor statistics | ‘mpstat -P ALL’ |
| iostat | CPU utilization report | ‘iostat -C 2 3’ |
For continuous monitoring script automation, combine `mpstat` with `awk` to extract CPU usage percentages. Load averages exceeding your Pi’s core count indicate system strain requiring load balancing techniques. Consider implementing real-time visualization tools like LED indicators or graphical overlays for at-a-glance assessment. For extensive system management, explore integrated monitoring solutions using MRTG or SNMP for network-based dashboards.
Monitoring GPU Memory Allocation
Effective GPU memory allocation monitoring on Raspberry Pi is essential for optimizing performance and diagnosing resource constraints. The VideoCore GPU shares system RAM, making proper allocation vital for balancing resources between CPU and GPU components.
Balancing GPU memory allocation on Raspberry Pi is crucial for maintaining optimal system performance while avoiding resource bottlenecks.
Check current GPU memory allocation with `vcgencmd get_mem gpu` to see how much RAM is reserved for graphics processing.
Monitor ARM (CPU) memory with `vcgencmd get_mem arm` to understand the complementary allocation.
Adjust allocation by modifying the `gpu_mem` parameter in `/boot/config.txt` based on your application needs.
Run `vcgencmd mem_reloc_stats` and `vcgencmd mem_oom` for advanced memory relocation statistics and out-of-memory detection.
These commands provide significant insights for GPU memory allocation optimization, helping you fine-tune performance for your specific Raspberry Pi application requirements.
Setting Up SSH For Remote Access
To set up SSH on your Raspberry Pi, either enable it through the desktop configuration interface or create an empty file named “ssh” in the boot partition of your SD card before first boot.
You’ll need your Pi’s IP address (found using `hostname -I`) or hostname to connect using the command `ssh username@hostname.local` from Linux/macOS or through clients like OpenSSH/PuTTY on Windows.
If connection fails, verify both devices are on the same network, confirm SSH is actually enabled on the Pi, and check for any firewall settings that might be blocking port 22.
Initial Setup Process
While setting up your Raspberry Pi for remote access, enabling SSH (Secure Shell) represents a critical initial step that allows you to control your device from anywhere on your network without needing a dedicated monitor and keyboard.
Your initial configuration steps should include activating this essential service through one of several methods.
After completing these initial setup considerations, you’ll need to identify your Pi’s IP address before connecting with the command `ssh username@ip-address` from any device on your network.
Troubleshooting Connection Issues
After establishing SSH connectivity on your Raspberry Pi, you may encounter connection obstacles that require methodical troubleshooting. When faced with “connection refused” errors, verify SSH is enabled using `sudo systemctl status ssh` and check firewall connection settings with `sudo ufw status`.
For network configuration checks, confirm your Pi’s IP with `hostname -I` and test reachability through ping before attempting SSH.
Authentication error resolutions often involve reviewing SSH key management permissions or resetting credentials. If problems persist, examine logging and monitoring in `/var/log/auth.log` for specific failure details.
Static IP setups can create connectivity issues—verify your configuration files aren’t misconfigured. Common port issues on 22 typically require service restart protocols (`sudo systemctl restart ssh`).
Remember that Raspberry Pi reachability tests should confirm you’re on the same network before deeper SSH troubleshooting tips are applied.
Creating Scheduled Tasks With Cron
Scheduled tasks form the backbone of automation on your Raspberry Pi, and the cron system provides a powerful way to execute commands at specified intervals.
Mastering cron job scheduling transforms your Pi from a simple computer into an autonomous system that works for you around the clock.
To get started with task automation:
Remember that cron runs in a limited environment, so explicit path definitions are essential for reliable execution.
Mounting USB Drives Automatically
To mount USB drives automatically on your Raspberry Pi, you’ll need to implement either permanent mount configurations or systemd-based automount solutions.
For permanent mounting, add the drive’s UUID to your `/etc/fstab` file with appropriate options like `nofail` to prevent boot failures if the drive is disconnected.
Systemd offers more dynamic automounting through unit files that can detect and mount USB drives when connected without requiring them to be present at boot time.
Permanent Mount Setup
Setting up permanent mounts for USB drives on your Raspberry Pi guarantees they’re automatically available whenever your system boots, eliminating the need for manual mounting commands.
To configure this properly, first identify your USB drive’s UUID using `sudo blkid` for consistent referencing across reboots.
Create a dedicated mount point directory and edit your `/etc/fstab` file with the appropriate parameters:
Test your fstab configuration with `sudo mount -a` before rebooting to verify proper mounting.
Automount With Systemd
Systemd offers a more dynamic approach to automounting USB drives compared to static fstab entries.
You’ll need two unit files: a mount unit describing the device and mount options, and an automount unit specifying the trigger path.
Using UUIDs instead of /dev/sdX guarantees consistent targeting regardless of connection order.
The automount benefits are significant: your system boots faster without waiting for devices, mounts happen only when accessed, and configuration remains declaratively managed within systemd.
For reliable setup, retrieve your device UUID with `blkid` before creating your units.
When troubleshooting automount issues, verify mount point permissions first, then check logs with `journalctl -u your-mount.automount`.
After any unit file changes, run `systemctl daemon-reload` for systemd to recognize updates.
Test by accessing your mount point and verifying with `mount`.
Backing Up Your SD Card
Backing up your Raspberry Pi’s SD card represents one of the most critical maintenance tasks you should perform regularly. Using the `dd` command creates complete disk images with a syntax like `sudo dd if=/dev/sdX of=~/backup.img bs=4M status=progress` after unmounting all card partitions.
Restoring your backup simply requires reversing the process: `sudo dd if=~/backup.img of=/dev/sdX bs=4M status=progress`.
Resizing The Filesystem

Filesystem management on Raspberry Pi often requires resizing to utilize your SD card’s full capacity. The most efficient approach is using `raspi-config`: simply run `sudo raspi-config`, navigate to “Advanced Options” → “Expand Filesystem,” and reboot with `sudo reboot`.
Making the most of your Pi means expanding its filesystem—a few clicks in raspi-config unlocks your SD card’s full potential.
For manual partition resizing, employ `parted` to modify the partition table: `sudo parted /dev/mmcblk0`, then use `resizepart` to adjust boundaries, followed by `sudo resize2fs /dev/mmcblk0p2` to expand the filesystem.
GParted offers a visual alternative for storage optimization—install it via `sudo apt install gparted` and visually resize partitions through its interface.
Before attempting any filesystem modifications, perform a data backup to prevent potential loss.
Always verify successful expansion with `df -h` after completing the resize operation.
Checking For Available Updates
Regular system maintenance on your Raspberry Pi requires keeping all software up-to-date to guarantee security, stability, and access to the latest features. The process involves a sequence of important update commands to manage available package updates efficiently.
After completing updates, reboot your Pi with `sudo reboot` to apply all changes properly.
Installing Python Libraries With Pip
Python libraries expand your Raspberry Pi’s capabilities far beyond its default functionality.
Begin with proper pip installation methods by running `sudo apt install python3-pip`, then verify with `pip3 –version`. For library version compatibility, use specific version arguments: `python3 -m pip install “package_name==1.4″` or range specifiers like `>=1,<2`.
Create virtual environments setup with `python3 -m venv env_name` and activate them to avoid conflicts with system-wide package management. This approach facilitates managing package dependencies while allowing experimentation.
When working with multiple dependencies, using requirements files streamlines installation: `pip install -r requirements.txt`.
For upgrading installed packages, use `python3 -m pip install –upgrade package_name`.
Troubleshooting pip issues often involves checking Python package indexing connections or examining dependency conflicts via `pip list`.
Running Python Scripts
Once you’ve written your Python script, executing it on your Raspberry Pi requires understanding several terminal commands and execution methods.
Terminal control offers advantages beyond IDE execution, providing more flexibility and automation capabilities.
These script execution methods transform your Raspberry Pi from a simple development platform into a powerful automation tool for your innovative projects.
Viewing Network Connection Details
Managing network connections on your Raspberry Pi requires five essential monitoring commands for retrieving configuration details and diagnosing connectivity issues. These network diagnostics tools provide thorough interface statistics and enable efficient wireless troubleshooting when connectivity problems arise
| Command | Function |
| `ip addr show` / `ifconfig` | Displays all network interfaces with IP addresses and status |
| `sudo iwlist wlan0 scan` | Scans and lists available wireless networks with signal strength |
| `iwconfig wlan0` | Scans and lists available wireless networks with signal strength |
| `nmcli dev wifi list` | Lists visible Wi-Fi networks with signal levels via NetworkManager |
| `ping | Tests connectivity and displays routing information |
When performing connectivity tests, these commands reveal whether interfaces are properly configured, connected to the intended network, and successfully routing traffic—critical information for maintaining robust Pi networking.
Setting A Static IP Address
Configuring a static IP address on your Raspberry Pi guarantees reliable network accessibility, especially for headless setups or servers that require consistent addressing.
The configuration method depends on your Raspberry Pi OS version, with two primary approaches available.
Always verify your chosen address doesn’t conflict with other network devices before applying changes.
Changing Your Pi’s Hostname
The hostname serves as your Raspberry Pi’s identity on local networks, making it essential for device recognition and network troubleshooting. You can modify this identifier through either the graphical `raspi-config` utility or terminal commands.
| Method | Command | Requires Reboot |
| raspi-config | `sudo raspi-config` | Yes |
| Edit files | `sudo nano /etc/hostname` | Yes |
| hostnamectl | `sudo hostnamectl set-hostname newname` | No |
| Automatic hostname retrieval | ‘hostname’ | N/A |
When selecting a new hostname, remember that hostname character validation restricts you to lowercase letters, numbers, and hyphens only. After changing the hostname, you’ll need to update both `/etc/hostname` and `/etc/hosts` files if using the manual method. For immediate network recognition, reboot your Pi with `sudo reboot`.
Controlling GPIO Pins From Terminal
Beyond network configuration, your Raspberry Pi offers powerful hardware control capabilities through its General Purpose Input/Output (GPIO) pins.
These versatile interfaces enable direct hardware manipulation using simple terminal commands.
For advanced applications, implement GPIO script automation with bash scripts containing loops and signal handlers that guarantee proper cleanup, reducing GPIO error troubleshooting when developing custom control systems.
Reading From Sensors Connected To Pi
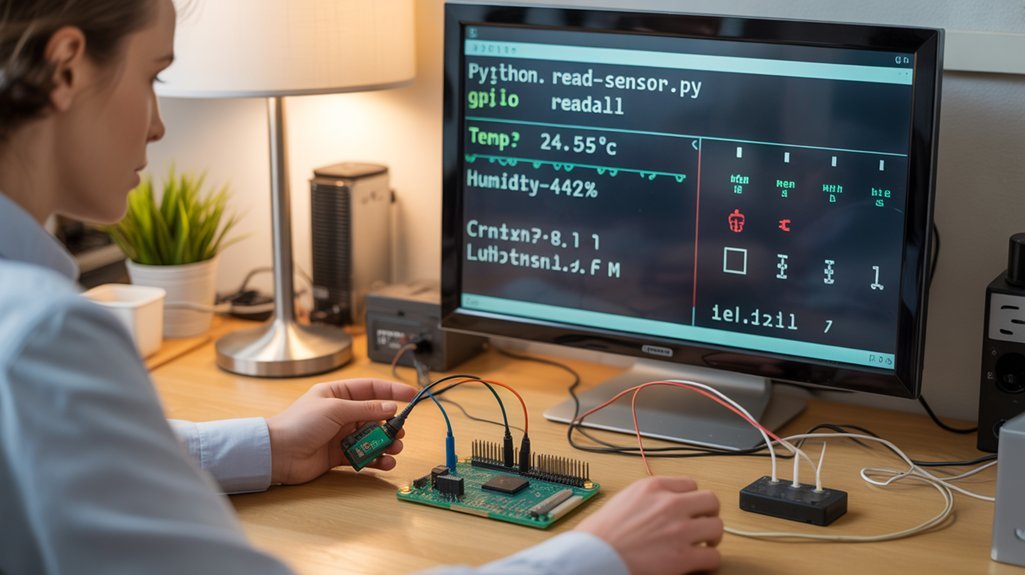
Connecting sensors to your Raspberry Pi transforms it from a simple computer into a powerful data collection system capable of monitoring everything from temperature to motion.
To read serial communication sensors, use Python scripting with pyserial to detect start bytes and parse incoming data blocks, often requiring checksum verification to guarantee data integrity.
For temperature monitoring, I2C sensors connect directly to GPIO pins and can be read with i2c-tools, while DS18B20 sensors use the 1-wire protocol accessible through `/sys/bus/w1/devices/`.
When troubleshooting connections, verify proper sensor wiring: TX outputs to Pi’s RX pins for serial devices, and correct data lines for I2C/1-wire interfaces.
Command-line tools like `i2cdetect` and `cat` provide quick sensor data access, but custom Python scripts offer more sophisticated data parsing for complex sensor integration.
Overclocking Your Raspberry Pi
While connecting sensors expands your Pi’s monitoring capabilities, pushing its performance boundaries through overclocking reveals even greater computational power.
Maximize performance gains by editing `/boot/config.txt` to increase frequency settings beyond factory defaults. Before implementing voltage adjustments, capture baseline readings with `vcgencmd measure_clock arm` and `vcgencmd measure_temp`.
Manual configuration offers greater control than preset profiles, but requires careful frequency tuning to prevent throttling or data corruption.
Always balance performance ambitions against temperature management concerns.
Viewing Kernel Messages
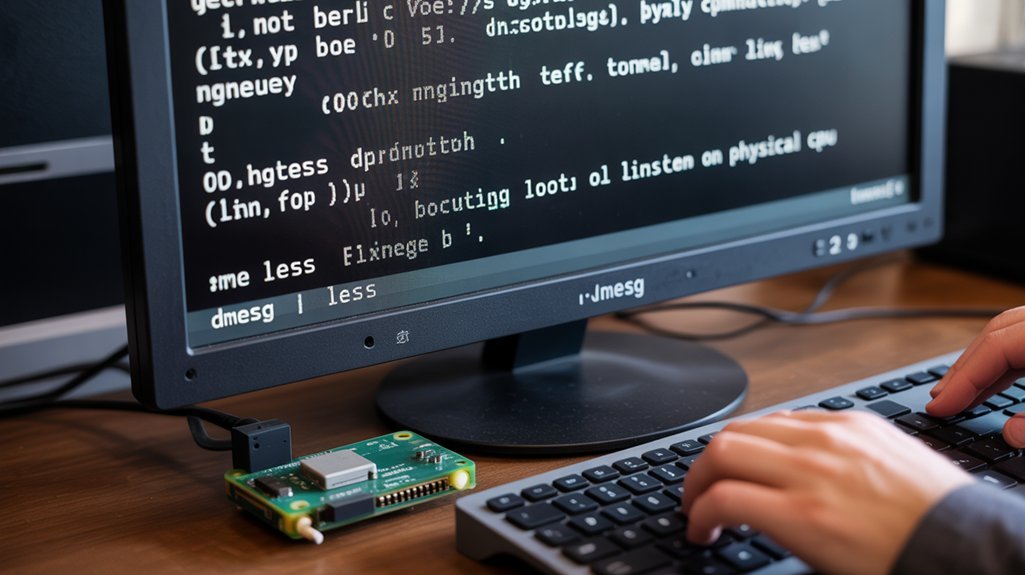
When troubleshooting system issues or understanding hardware interactions, kernel messages provide critical insight into your Raspberry Pi’s operation at the lowest level. The `dmesg` command gives you direct access to the kernel ring buffer, displaying boot sequences, hardware detection events, and system errors.
For effective kernel message analysis, use filtering techniques like `dmesg | grep
For persistent monitoring, consider redirecting output to log files or using `dmesg –follow` for real-time observation. Root privileges may be required, so prepend commands with `sudo` when necessary.
Configuring Boot Options
The Raspberry Pi’s boot process can be extensively customized through several configuration methods that give you granular control over how your system initializes.
Mastering boot configuration enables advanced setups like multi-boot environments and performance optimization.
For multi-boot management, utilize the `boot_partition` parameter in conjunction with `autoboot.txt` to implement A/B boot strategies.
This approach facilitates seamless OS upgrades while maintaining fallback options through the `[tryboot]` filter.
Checking Hardware Information
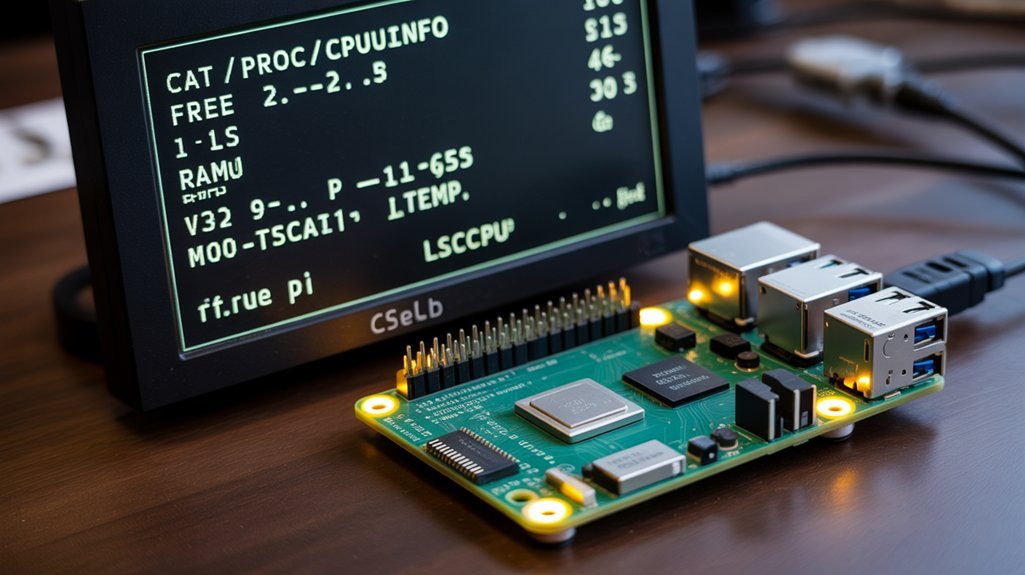
Understanding your Raspberry Pi’s hardware specifications provides vital insights that enable proper configuration, performance optimization, and compatibility assessment for your projects. You can retrieve CPU information with `cat /proc/cpuinfo`, identifying hardware revisions and checking processor capabilities.
Know your Pi’s hardware specs to configure optimally and ensure project compatibility.
For precise model identification, use `cat /sys/firmware/devicetree/base/model`. Monitor memory allocation with `free -h` or view detailed statistics via `cat /proc/meminfo`. These commands help diagnose performance bottlenecks.
Track system health by monitoring temperature with `vcgencmd measure_temp` and voltage levels using `vcgencmd measure_volts`.
For performance tuning, check GPU memory allocation through `vcgencmd get_mem gpu` and CPU clock speed with `vcgencmd measure_clock arm`. These diagnostics are essential when optimizing your Pi for compute-intensive or graphics-heavy applications.
Frequently Asked Questions
How Do I Run Applications at Startup Automatically?
You can run startup applications automatically by adding .desktop files to ~/.config/autostart, configuring LXSession, using rc.local for boot-time scripts, or creating systemd services for persistent background processes.
How Can I Create a Headless Setup Without Using a Monitor?
Over 70% of Pi users prefer headless setups. Flash Raspberry Pi OS, create an “ssh” file on the boot partition, configure wpa_supplicant.conf for WiFi, then use remote login via SSH after booting.
How Do I Enable and Use VNC for Remote Desktop Access?
Enable VNC through ‘sudo raspi-config’ under Interfacing Options. After configuration, connect remotely using a VNC viewer with your Pi’s IP address. You’ll gain complete remote access to your Raspberry Pi’s desktop.
Can I Use My Raspberry Pi as a Network-Wide Ad Blocker?
Tired of ads everywhere? You can transform your Pi into a powerful network filtering solution using Pi-hole, which provides extensive ad blocking across all connected devices without individual software installations.
How Do I Troubleshoot When My Pi Won’t Boot Properly?
When your Pi encounters boot issues, follow these structured troubleshooting steps: check power supply connections, inspect SD card integrity, verify bootloader functionality, and eliminate peripheral conflicts through systematic hardware diagnostics.
Practice Using these Raspberry Pi Commands Today!
Armed with these 45 Raspberry Pi commands, you’ve transformed from a novice navigator to a Pi-rate captain sailing the digital seas. You’ll monitor your system’s essential signs, optimize network configurations, and extract peak performance from your microcomputer. Like a skilled technician with a precisely calibrated toolset, you’re now equipped to diagnose, troubleshoot, and enhance your Raspberry Pi’s capabilities through the terminal’s powerful interface—your command center for complete system mastery.
